Step-by-Step Guides
Edit a label in the label editor
Change what a label shows, make long names fit, line things up, check every kind of sale and print a test label.
Last updated 2026-10-08 · Applies to NotBot 1.4.4+ · Identical to the stable docs
The label editor is where you change what is on a label: which details it shows, how big they are and where they sit. This guide edits the item label that Buyer Only mode prints for Buy It Now sales, giveaways and other sales. Every label in NotBot works the same way.
You don't need to know any design tools. Nothing you change reaches your printer until you click Save, and the built-in design is never lost: saving makes your own copy.
Before you start
- NotBot is installed and you are signed in. If not, follow Sign in to NotBot.
- Your printer is set up, so the test print has somewhere to go. See Connect and test your printer.
- To pick a different ready-made design instead of editing one, see Change which design a label uses.
Open the label
Step 1: Click Customize
In the purple bar at the top of the NotBot window, click Customize. It opens on the Labels tab.

Step 2: Pick the label you want to change
On the left, under Labels that print right now, NotBot lists every label your settings can print. Under each name it shows the size and what the label prints for.
Click the label you want to change. In this guide we click Item label with box number.

Step 3: Click Edit
The right side shows the label as it prints today. At the top right, click the purple Edit button.

Step 4: Find your way around the editor
The editor has three parts:
- Fields on the left: the details this label can show, each with the sample value you see on the label. Click one to add it, or drag it onto the label.
- The label in the middle, drawn at its real shape. The details on it are sample values, so you can see how a real label will look.
- The settings on the right. They change whatever you click on the label.
The purple strip at the top says when you are looking at a built-in design. You can change it freely: saving makes your own copy and keeps the original.

Change what a detail shows
Step 5: Click a detail on the label
Click the detail you want to change. A purple frame with its name appears around it, and the panel on the right shows its settings.
In this guide we click x123 in the bottom right corner. That is the Quantity field, which shows how many of an item the buyer bought.

Step 6: Choose what it shows
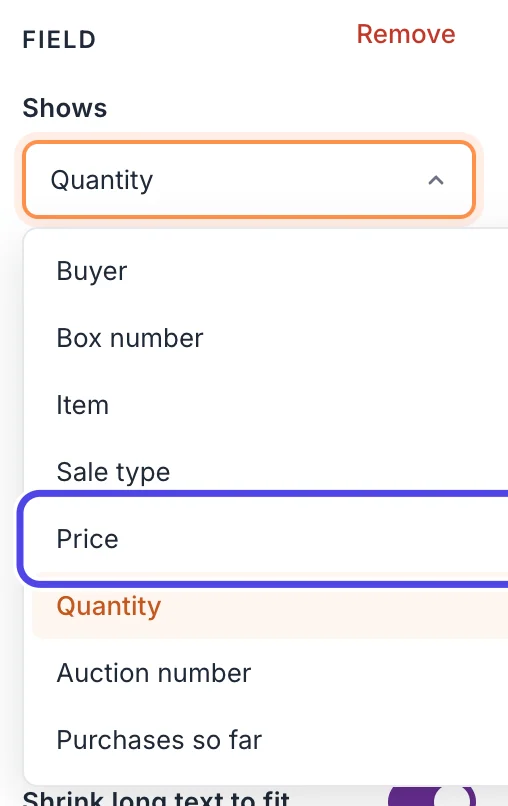
At the top of the panel on the right, click the box under Shows and pick another field. We pick Price, so the corner shows what the item sold for instead of the quantity.
The size, position and look stay the same. Only the detail changes.
Step 7: Make the price a small detail
Under Shows you can change:
- Size: the text size in points. Type a bigger or smaller number.
- Align: Left, Center or Right inside its frame.
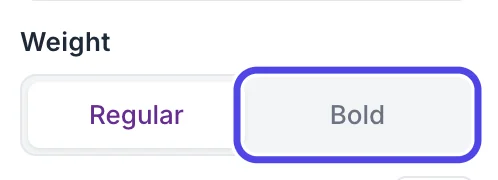
- Weight: Regular or Bold.
- Shows on: Every label, or First-time buyers only for something that should print only when the platform marks the buyer as a first-time buyer.
To take a detail off the label, click Remove at the top of the panel, or press Delete on your keyboard.
A label is easiest to read when the details you look for while packing are big and bold, and the rest is smaller. The price is a detail, so on this label we click Regular under Weight (circled).

Make long names fit
Step 8: Try a long name
Usernames and item names can be much longer than the samples. Under the label, in the Sample row, click Try a long name. The sample buyer becomes vintagevibes_collector22, one of the longest names you will see.
The sample only changes the picture. Nothing in the Sample row is saved with the label.

Step 9: Choose wrap or shrink for the name
Click the buyer's name on the label. Two switches in the panel on the right decide what happens when text is too long for its frame:
- Wrap onto more lines moves the rest of the text onto a new line. Good for item names in a tall frame.
- Shrink long text to fit makes the text smaller until it fits on its line.
On this design the buyer's name already shrinks, so the long name still fits on one line.


Step 10: Make the name bold
With the buyer's name still selected, click Bold under Weight. Next to the box number, the name is what you look for when you pack an order, so it should stand out.
Step 11: Move the name next to the box number
The box number and the name are the header of the label and should read as one line. On this design the name starts well to the right of the number, so we move it closer.
With the name still selected, click Exact position at the bottom of the panel on the right. It shows where the frame sits, in inches from the left and top edges of the label. Type 0.5 in Left (1) to start the name half an inch from the edge, right after the number, and 2.4 in Width (2) so the frame still ends at the same place on the right.
Dragging works too; Exact position is easier when things must line up exactly.


Step 12: Type a sample that looks like your sales
The sample buyer and item decide what you see on the label while you edit, and what the test print shows. Type a username and an item like the ones in your shows, in the Buyer and Item boxes of the Sample row under the label. We type thriftqueen_jo and Levi's 501 Jeans, 32 x 30.
The item's frame has Wrap onto more lines on, so a longer item name moves onto a second line inside it instead of running off the label. Like Try a long name, the sample is never saved with the label.

Move things and line them up
Step 13: Drag a detail to move it
Point at a detail, hold the mouse button down and drag. When the detail reaches the middle or an edge of the label, it snaps there and a dotted purple line shows where. When it is in the exact middle, Centered appears at the top of the label. Let go of the mouse button to drop it.
To move it without snapping, hold Alt (Option on a Mac) while you drag. For small moves, click the detail and press the arrow keys. Drag one of the small squares on its corners to make its frame bigger or smaller.

Check it for every kind of sale
Step 14: Use Preview as
One label can print for several kinds of sale, and a few details change with them. Under the label, Preview as lists the sales this label prints for. Click one to see the label for that sale. We click Accepted offers, and the sale type at the bottom changes to OFFER ACCEPTED.
Preview as only changes the picture and the test print. It does not change when the label prints. We click Buy It Now again before printing a test label.


Print a test label and save
Step 15: Click Test print
At the top right, click Test print. NotBot prints the label as it is on your screen right now, with the sample buyer and item, on the printer this kind of sale prints on. You don't need to save first.
The button says Sent when the label has gone to the printer. Check the printed label: is everything readable, and does nothing run off the edge?

Step 16: Click Save
When you are happy with it, click the purple Save button at the top right. You can also press Cmd+S on a Mac or Ctrl+S on Windows.
Because you started from a built-in design, NotBot saves your own copy, named after the original with (mine) at the end, and uses it for this label from the next sale. The top of the editor says Saved as and the new name. The built-in design stays in All designs if you ever want it back.
Made a mistake before saving? Click Undo (Cmd+Z on a Mac, Ctrl+Z on Windows) as many times as you need.

Step 17: Check the finished label in Print preview
Click Print preview at the top. The frames and the grid disappear and the label shows in plain black and white, the way your printer prints it, with your sample sale. Click Print preview again to go back to editing.
Read it the way you would while packing: the box number and the buyer's name first, then the item, then the sale type and the price.
The star with 7 in the bottom left corner prints only when the platform marks the buyer as a first-time buyer, so you know to add a welcome note: 7 means they are the seventh first-time buyer in this show. The sample shows it because First-time buyer is on in the Sample row. Turn that off to see the label a returning buyer gets.

Step 18: Look at the printed label
This is the label the test print sent to the printer, at its real 2" x 3" shape: the same as Print preview, with the price where the quantity used to be, for a Buy It Now sale.

Step 19: Click Back
Click Back at the top left to return to your labels. The label now shows your design's name, and new labels print with it.
If you click Back before saving, NotBot asks whether to Save, Don't save or Keep editing.
If something looks different
I clicked Test print and nothing came out
Test print uses the printer this kind of sale is set to print on. Check that your printer is on and connected, then follow Labels are not printing: step-by-step fixes. If Preview mode is on (Customize › Advanced Settings › Printers & routing), NotBot opens the label as a PDF on your screen instead of printing it.
Something on my label looks faded in the editor
That detail is set to show on First-time buyers only, and the sample buyer is not a first-time buyer right now. Turn on First-time buyer in the Sample row under the label to see it as it prints for a first-time buyer.
A detail will not stop jumping to the middle when I drag it
NotBot snaps details to the middle and edges of the label. Hold Alt (Option on a Mac) while you drag to place it anywhere.
I want the original design back
Click the label, click Change design and pick the design marked built in. Your own copy stays in All designs. See Change which design a label uses.